Installing Boom & First Launch
Installing Boom
You should find Boom's DMG (Boom.dmg) file in your Downloads folder after you've downloaded it from our website. Double click the Boom.dmg file to open it.
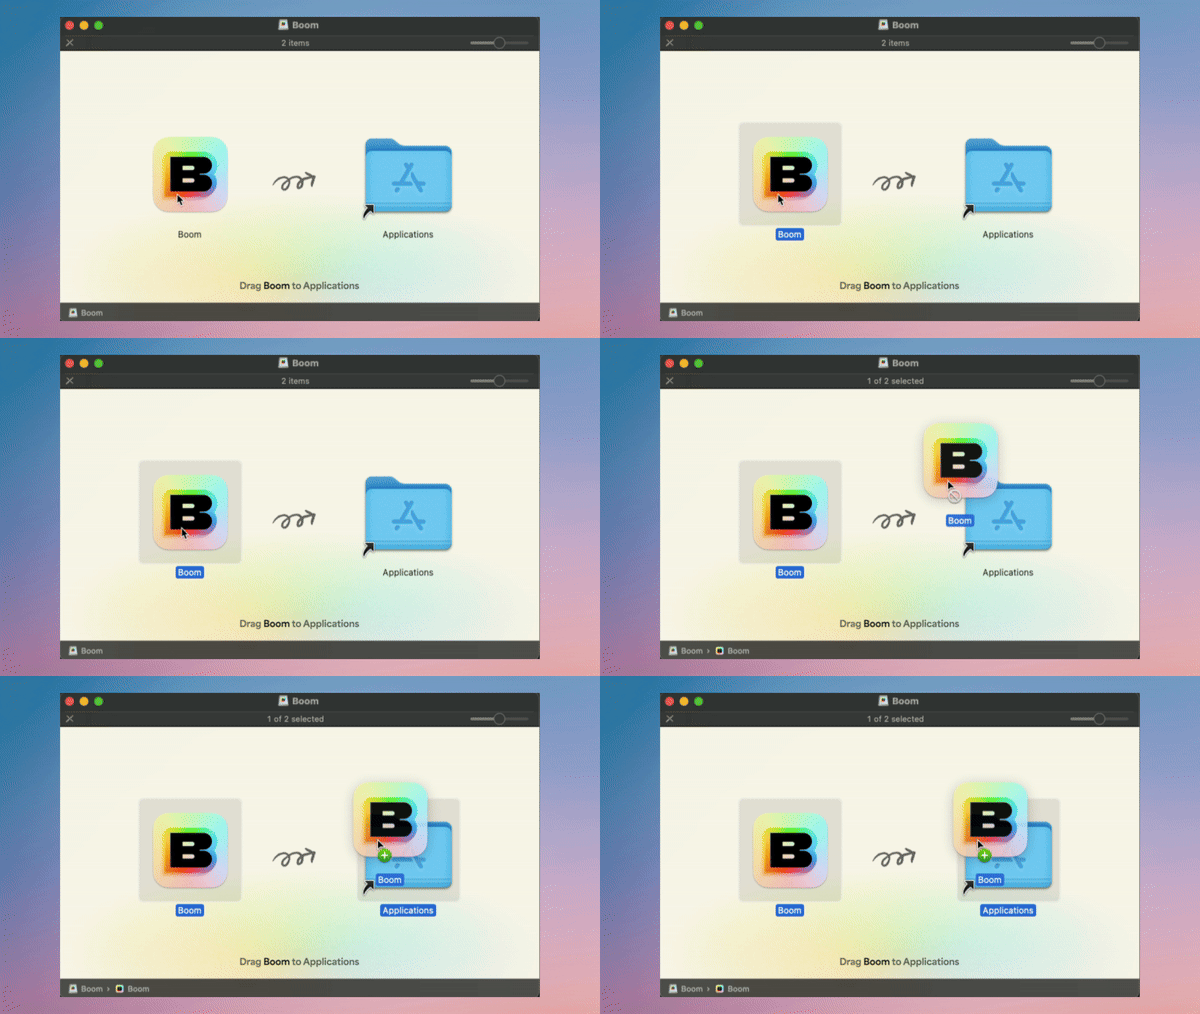
Once you see this window, you'll need to drag and drop the Boom app icon onto the Applications folder.

You're all set: Boom is now installed! You can go ahead and eject the DMG from your computer either from your desktop or through Finder.
First Launch
From your Applications folder, double click on the Boom.app file. You will first be presented with a warning telling you that Boom is an app downloaded from the internet, go ahead and click “Open” and then you will be asked to sign in to Boom with your Google account.

Next, Boom will ask for permission to access your camera as well as install the Boom camera extension.
You can read more about the permissions Boom requests at Permissions.Click on "Open System Settings".

If you are using macOS 14 Sonoma you will see the following:

Click "Allow" (1) and then enter your password if prompted.If you are using macOS 15 Sequoia, you will see the following screen:

(1) first click on the toggle to give Boom access, then click "Done" (2). Enter your password if prompted.
Okay, onto the fun stuff. Select your Video input from the drop down menu (1) and you are good to go!

💡 Note: If you had your browser or video streaming client open while installing Boom, you may have to quit (cmd + Q) and reopen them for the Boom Camera to be available as a camera option.